How to Install Door Weatherstripping in 2026?

Time:2026-11-06 Author:Isabella
0%

A door can look closed and still leak air around its edges. You may feel the problem as a cool draft near your ankles, hear traffic through the latch side, or notice daylight beneath the threshold. In 2026, weatherstripping remains a simple, practical way to address those gaps, but the right material and fit matter. The U.S. Department of Energy’s Energy Saver guidance says heating and cooling account for about 43% of household energy use. ENERGY STAR estimates that sealing and insulating a home can reduce average heating and cooling costs by about 15%; that figure covers broader home improvements, not weatherstripping alone.

This guide explains How to install door weatherstripping, from checking the frame to choosing a seal and testing the finished door. You’ll learn how to measure the head and jambs, clean the surface, cut the material, and position it without stopping the door from latching. Details matter. A seal that is too thick can make the handle resist, while a short piece can leave a narrow but persistent gap. Foam, rubber, and door sweeps each suit different locations and wear patterns. Follow product instructions, and check the door’s movement before calling the job done. One honest caveat: a new strip cannot fix a warped door or a poorly aligned frame. Inspect carefully; the cause is not always obvious.
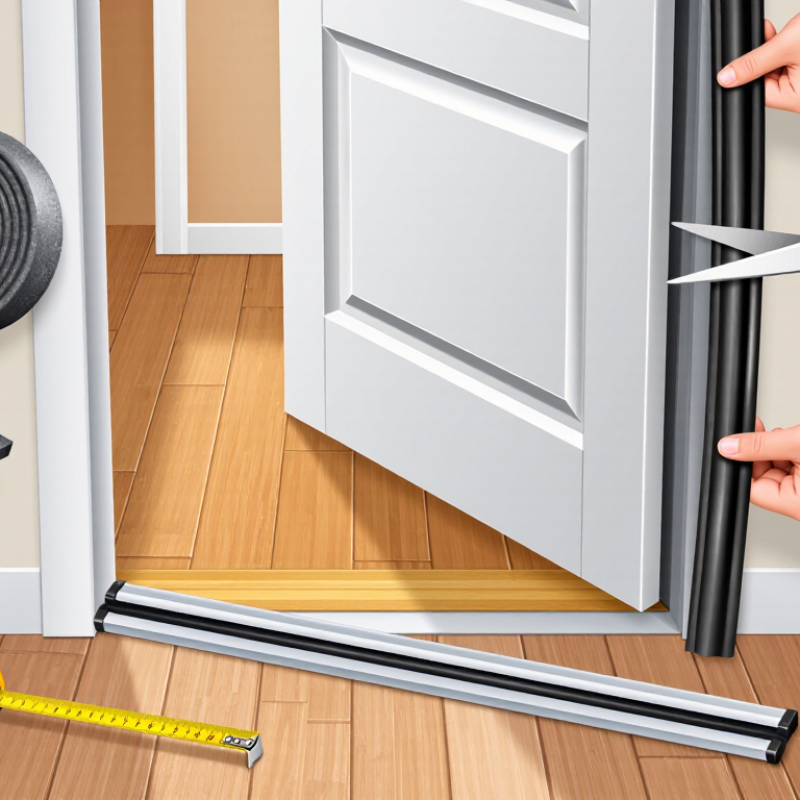
How to Install Door Weatherstripping in 2026?

Understanding Door Weatherstripping Types and How They Work

How to Install Door Weatherstripping in 2026? Understanding Door Weatherstripping Types and How They Work

Door weatherstripping works by closing the small gaps where a door meets its frame or threshold. Compression strips, often foam or rubber, flatten when the door shuts and suit uneven jambs. V-strip, also called tension seal, folds into a V and springs back against the door edge. A door sweep blocks drafts beneath the door; its flexible blade brushes the threshold as the door moves. Each type solves a different gap. One strip rarely seals every edge.

Material matters. Foam is easy to fit but may compress or wear sooner in high-use entryways. Vinyl and rubber seals usually resist repeated contact better, though a poor fit can still leave leaks. ENERGY STAR’s home-upgrade guidance estimates that air sealing and insulation together can save an average of 15% on heating and cooling costs. That figure is not a weatherstripping-only estimate; results depend on the home and existing leaks. A small gap can still create a noticeable cold line across the floor.

Tips: Close the door on a thin sheet of paper; if it slides out easily, check that spot for a weak seal. Measure each side separately, clean the surface, and avoid crushing compression seals during installation. Check the latch, too. A seal that is too thick can prevent the door from closing properly.

How to Install Door Weatherstripping in 2026

Choose a seal that matches the gap and location. The ranges below are approximate examples; actual coverage varies by product and door.

Installation tip: Measure the gap around the door and along the bottom before buying. Apply perimeter seals to clean, dry surfaces, then close the door to check for a snug fit without making it difficult to latch. Install a door sweep at the bottom and trim it so it contacts the threshold evenly.

Choosing Weatherstripping for Your Door and Climate

Choosing weatherstripping starts with the door, not the package. Check the gap around the jamb and beneath the door on a windy day; a thin strip of paper that slips out easily can reveal a poor seal. For most hinged exterior doors, a compressible gasket around the frame and a door sweep at the bottom are practical choices. Measure the gaps at several points, since older doors are rarely perfectly even.

Climate matters. In cold, windy areas, durable rubber or silicone-style compression seals can help limit drafts and stand up to repeated closing. Foam is easy to fit, but it may compress or wear sooner. In hot, sunny locations, look for material rated for UV exposure. Where rain and humidity are common, choose moisture-resistant seals and keep drainage paths clear. Small detail, big difference.

Match the seal thickness to the gap. An oversized gasket can make the latch hard to close; one that barely touches may leave air leaks. I would not assume one material suits every doorway, even if the climate seems straightforward. Clean and dry the frame before installation, then close the door to check for even contact. A little light at one corner means the fit needs another look.

Gathering Tools and Preparing the Door Frame

Before choosing weatherstripping, inspect the door and frame in daylight. Gather a tape measure, pencil, utility knife, screwdriver, mild cleaner, and cloth. A flashlight helps reveal narrow gaps; a strip of paper can test whether the closed door grips evenly.

The U.S. Department of Energy’s Energy Saver guidance estimates that air leaks account for 25%–40% of heating and cooling energy use in a typical home.

That figure covers the whole home, not doors alone. Still, it shows why careful preparation matters. Keep it simple.

Open the door and check the jamb, stop, threshold, hinges, and latch side for dirt, splinters, peeling paint, or old adhesive. Clean the surfaces and let them dry fully; adhesive may fail on damp or dusty wood. Use a straightedge to spot bowed areas, tighten loose hinge screws, and measure the gap at several points around the frame. Record the widest gap so you can choose a seal designed to accommodate it. I’m tempted to blame worn stripping, but a sagging door can create the same draft. Don’t rush past that check. If the threshold is damaged or the frame is badly out of square, address it before fitting the new seal; otherwise, a tidy installation can still leave a chilly gap near the floor.

Installing Door Weatherstripping Step by Step

Before installing door weatherstripping, close the door and inspect the gaps around its top, sides, and bottom. Look for daylight, drafts, or uneven contact. Do not guess. Measure each side separately; older frames are often slightly uneven. Choose a seal that matches the gap and door location. A strip that is too thick can make the door difficult to latch. Remove old material and scrape away loose residue. Clean the frame, then let it dry completely so the adhesive can grip.

Cut the new strips to fit, checking each measurement before trimming. It is easy to rush this part, but a second check can prevent a crooked seal. For adhesive-backed weatherstripping, peel away a little backing at a time and press the strip firmly onto the frame without stretching it. Keep corners neat, and avoid covering hardware or drainage openings. Close the door gently and check that it latches without force. Slide a sheet of paper between the door and seal; it should resist being pulled out, but not tear. Adjust any loose or overly tight sections. Install a door sweep last, keeping it just in contact with the threshold. A small gap may remain, so inspect the fit again after a few days of use.

Testing the Seal and Adjusting the Installation

After installing the weatherstripping, close the door gently and check how it meets the frame. Run your hand along the edges to feel for moving air, especially near the upper corners and latch side. Try a paper strip, too: place it between the seal and frame, then close the door. It should resist a light pull. Check several spots. One tight section does not prove the whole seal is even.

If the paper slides out easily, inspect that area for a gap or a strip that has shifted. Press adhesive-backed material firmly into place, or adjust the fasteners on a screw-mounted seal. Make small changes and retest. The door should latch without a hard shove. Too much compression can make it difficult to close and may flatten the seal sooner. I learned that the hard way.

Look at the threshold with the door closed. A thin line of daylight can point to a low spot, but shadows can be misleading, so check with your hand or paper as well. Open and close the door several times after adjustments. The seal may settle, and temperature changes can alter the fit. If the door starts rubbing or the gap remains uneven, pause and reassess the alignment rather than adding more material.

FAQS

How does door weatherstripping reduce drafts?

It closes small gaps between the door, frame, and threshold. Compression strips flatten when the door shuts. V-strips press against the door edge, while sweeps block gaps underneath. One type rarely seals every edge.

Which weatherstripping works best around a door frame?

Compressible foam, rubber, or silicone-style seals can fit around the frame. Choose a thickness that touches the door without making the latch difficult to close. Check several spots; older frames are often uneven.

What can I use to seal the gap beneath a door?

A door sweep has a flexible blade that brushes against the threshold. It helps block drafts beneath the door. Make sure the threshold is in good condition.

How can I find leaks before installing a seal?

Close the door on a thin sheet of paper. If it slides out easily, check that area. A flashlight can also reveal narrow gaps. Small detail, big difference.

What tools should I prepare for installation?

Gather a tape measure, pencil, utility knife, screwdriver, mild cleaner, and cloth. A flashlight and paper strip help with inspection. Keep it simple.

How should I prepare the door frame?

Remove dirt and old adhesive, then let the surface dry fully. Check for splinters, loose hinge screws, and bowed sections. A sagging door can create drafts, too. Easy to miss.

Does climate affect which seal I should choose?

Yes. In sunny areas, look for material suited to UV exposure. In damp climates, choose moisture-resistant seals and keep drainage paths clear. I wouldn’t assume one material suits every doorway.

Can weatherstripping lower heating and cooling costs?

Sealing air leaks can contribute to energy savings, but results depend on the home and its existing leaks. A general estimate for air sealing and insulation together is an average 15% savings. That is not a weatherstripping-only figure.

Conclusion

How to install door weatherstripping begins with understanding the available types, such as adhesive foam, V-strip, and door-bottom seals. Each works differently, so consider the gap around your door, how often it is used, and your local climate. A durable seal should block drafts and moisture without making the door difficult to open or close. Before starting, gather a tape measure, utility knife, cleaning cloth, and any fasteners required for your chosen material.

Prepare the door frame by cleaning and drying the surfaces, then measure each side carefully and cut the weatherstripping to fit. Attach it evenly, following the product’s installation directions, and avoid stretching flexible materials. Close the door to check for consistent contact around the frame. If you still feel a draft or the door catches, adjust the placement or trim excess material. A final inspection helps confirm the seal is snug, even, and functional.

Isabella

Isabella

Isabella is a dedicated marketing professional with a sharp focus on driving brand growth and engagement through strategic content creation. With an extensive background in digital marketing, she combines her passion for storytelling with her keen understanding of industry trends to deliver......